Menu

Menu

CHANGE LOG

V3.0.6 – 23, Nov 2023
# Updated plugins.
# Added translate clear all shop page.
V3.0.5 – 23, Oct 2023
# Updated plugins.
# Fixed some bugs.
V3.0.4 – 18, Oct 2023
# Fixed swatch image crop.
V3.0.3 – 09, Oct 2023
# Fixed some bugs.
V3.0.2 – 08, Sep 2023
# Updated plugins.
# Fixed error icon navigation.
V3.0.0 – 24, Aug 2023
# Updated plugins.
# Optimized coding.
# Fixed some bugs.
V2.2.7 – 03, Jul 2023
# Updated plugins.
# Fixed some bugs.
V2.2.6 – 28, Jun 2023
# Updated plugins.
# Fixed some bugs.
V2.2.5 – 23, Jun 2023
# Fixed image resize bug.
V2.2.4 – 20, Jun 2023
# Fixed content mini cart bug.
V2.2.3 – 14, Jun 2023
# Fixed some bugs.
V2.2.1 – 07, Jun 2023
# Updated plugins.
# Fixed some bugs.
V2.2.0 – 05, Jun 2023
# Updated plugins.
# Fixed some bugs.
V2.1.9 – 10, May 2023
# Updated plugins.
# Updated document How to use 1-Click.
# Fixed some bugs.
V2.1.8 – 27, Apr 2023
# Updated plugins.
# Fixed error blog relate.
V2.1.7 – 28, Mar 2023
# Updated plugins.
# Fixed error send mail.
# Fixed error Product tab.
V2.1.5 – 24, Feb 2023
# Updated plugins.
# Added option  toolbar mobile.
# Fixed some bugs.
V2.1.4 – 13, Feb 2023
# Tested with PHP 8.1.x
# Fixed deprecated function Elementor. 
# Fixed some bugs.
V2.1.3 – 17, Jan 2023
# Fixed error Google font. 
# Fixed some bugs.
V2.1.2 – 10, Jan 2023
# Fixed some bugs.
# Updated plugins.
V2.1.1 – 21, Nov 2022
# Added translate language file.
# Fixed some bugs.
# Updated plugins.
V2.1.0 – 14, Nov 2022
# Updated WooCommerce template.
# Fixed some bugs.
# Updated plugins.
V2.0.5 – 17, Oct 2022
# Fixed Role User bug.
# Updated WooCommerce template.
# Fixed some bugs.
# Updated plugins.
V2.0.2 – 29, July 2022
# Fixed error logo option.
# Updated plugins.
V2.0.1 – 14, July 2022
# Fixed some bugs.
V2.0.0 – 05, July 2022
# Updated plugins version.
# Fixed small bugs.
V1.0.1 – 09, June 2022
# Updated 1-Click import function.
# Added Auriane Child theme.
# Updated and tested with latest of plugins version.
# Fixed some CSS.
# Fixed small bugs.
V1.0.0 – 08, June 2022
# Release.

If your visitors are receiving “mixed content” warnings when visiting your SSL-protected site, it’s likely that some pages are calling content (such as images, media files, or even scripts) from external locations over a HTTP connection (rather than HTTPS).

You can resolve these issues manually by searching through your site’s HTML code for HTTP hyperlinks and switching them to HTTPS. However, for WordPress, the Really Simple SSL plugin can automate discovery and resolution, making fixes quick and easy.

To install the plugin, log in to the WordPress administration dashboard and select Plugins > Add New. Search for Really Simple SSL, then click Install Now to proceed.

Once installed, click the Activate button to enable the plugin.

Read the guidance on screen and be sure to take a backup of your site before enabling SSL. When you’re ready, click Go ahead, activate SSL. You’ll then need to log back in to your WordPress site.

This feature dynamically fixes insecure content by replacing all http:// URLs with https:// (except hyperlinks to other domains), saving you potentially hours of work. You may still have to manually search for external URLs that are causing mixed content issues.

Click Settings > SSL to review the Really Simple SSL settings. Ensure Mixed content fixed was successfully detected on the front-end is checked.

Every company wants to be found on search engines. However, only a minority of them take the necessary steps to optimize their websites. In this post, I’ll show you exactly how to improve your core web vitals and increase conversion rates. When optimizing your core web vitals (CSS, HTML, page size), you should pay special attention to loading time, download speed, and mobile device responsiveness. While these three elements are frequently overlooked, they are critical for increasing conversions and improving user experience.

1. Implement A Caching Solution

Your web server’s performance, load time, pages per visit, and other key web metrics can all be improved by implementing a caching solution. You can reduce page load times by avoiding the need to send requests directly to the web server by offloading frequently visited material from the webserver onto a caching server. Additionally, this lessens server traffic congestion and improves overall effectiveness. Caches can also increase the number of pages per visit by providing previously seen pages directly from the cache rather than by repeatedly requesting them from the web server.

Users who are looking for certain information or outcomes can get a quick response from caches, which minimizes waiting times as website principal content is downloaded into memory and provided back to users right away. In Site Performance assessment tools, cache solutions are particularly crucial since they enable administrators to compare their websites to industry benchmarks and pinpoint areas for improvement. In conclusion, implementing a caching solution can improve site performance and user pleasure!

2. Optimize Your Images Without Losing Quality

Images are one of the most crucial components of your website. Poor-quality photographs can really result in decreased site traffic and significant client losses in addition to adding visual appeal and a feeling of professionalism. It’s crucial to optimize your photographs without compromising on quality for this reason. You may use a variety of free tools to enhance the quality of your images by making simple modifications to the brightness and cropping them.

However, if you want more advanced features such as resizeable thumbnails or watermarks, then you will need to invest in an image editor. Once you have optimized your images, be sure to submit them to search engines using popular image hosting sites like Flickr or Imgur. This will help increase their exposure and make them more visible when users perform keyword searches on Google Maps or other online resources.

3. Use A Content Delivery Network (CDN)

A content delivery network (CDN) is a technology that helps to improve the speed and performance of your website by distributing your web pages across multiple servers, It make the user experience good. This can help to reduce load times, minimize server crashes, and boost overall pageviews. By using a CDN, you can also offload some of the work involved in delivering web pages from your own servers to those of a third-party provider.

This will free up resources so that you can focus on creating high-quality content that people will want to read. Additionally, when users access your site from different locations around the world, their experience should be consistent regardless of their location or connection speed. In short, A CDN is an important tool for optimizing the performance and uptime of your website – it may even be what finally turns you into a successful online business!

4. Upgrade Your Hosting

Your website is one of your most important marketing tools, and it must operate at its best to attract qualified leads and generate sales. By upgrading your hosting plan, you’ll be able to improve performance overall, including faster page loading times, increased SEO potential due to better crawling and indexing capabilities, and enhanced security measures. Additionally, a higher-powered host can provide additional features such as email Marketing solutions or powerful automated scripts for improving site functionality.

When making the decision to upgrade your hosting plan, take into account not only the technical specifications of the platform but also budget constraints and business needs. For example, if you’re looking for a more comprehensive solution that covers all aspects of web management, then a premium hosting platform may be ideal. However, these types of platforms often come with hefty price tags! Regardless of which hosting platform you choose though – make sure to consult with a knowledgeable specialist who can help walk you through every step of the process so that everything goes smoothly from start to finish!

5. Implement Lazy Loading

By using lazy loading, you can ensure that your web pages load quickly and without leaving the user feeling overwhelmed. Lazy loading is a technique that allows certain elements of a page to be loaded asynchronously, instead of all at once. This way, the user isn’t forced to wait for the entire page to load before they can see anything.

The benefits of lazy loading include:

– Increased immersion for users: When a user feels like their experience is taking too long or seems overwhelming, it can negatively affect their mood and engagement on your website. By implementing lazy loading, you can decrease this sense of delay and make sure that your content remains visible throughout the entirety of the visit.

– Reduced server loads: Loading large chunks of data all at once will often result in higher server loads than loading them one piece at a time. Lazy loading also reduces how much data needs to be sent over wirelines and mobile networks – meaning fewer costly charges!

6. Optimize JS And CSS

By optimizing your JavaScript and CSS, you can improve the speed and performance of your website. This will help to reduce load times and make scrolling more smooth. Additionally, better code organization can lead to fewer errors on your pages. Better code also leads to Higher Standards HTML (HSHTML) which helps users perceive websites as being of higher quality than if they were not coded properly.

When it comes to optimization, there is so a one-size-fits-all approach that works for everyone. So be sure to experiment with different techniques until you find ones that work best for you and your website’s audience. There are many resources available online such as CodePen or Codetriage that offer helpful tips on how to optimize your code.

Now you can mix and match different pre-designed blocks, creating a new fast-pace process for creating your page. ​

Zahar is a Creative Multipurpose Elementor WordPress Theme for ClassicNFT MarketplaceICO landing pageArtificial IntelligenceBusinessIT companyMarketingPC BuilderUniversityTech StartupCorporateVaccination Medical Laboratory Covid-19PhotographyCreative Web StudioCo-working SpaceWedding InvitationTravel BlogModel AgencyCV/ResumeSaas Company and knowledgebase websites.

This creative WordPress theme utilizes an Elementor page builder which entails that you can simply drag and drop elements to build a website. In just 1-Click, you can try out any demo that you fancy until you come up with the best design that seamlessly resonates with your project. With more than five hundred different options and counting, you will never get tired of mixing and matching design combos.

Let your ideas run free, backed with Zahar, today!

Zahar - Creative Multipurpose Elementor WordPress Theme Zahar - Creative Multipurpose Elementor WordPress Theme Zahar - Creative Multipurpose Elementor WordPress Theme Zahar - Creative Multipurpose Elementor WordPress Theme Zahar - Creative Multipurpose Elementor WordPress Theme Zahar - Creative Multipurpose Elementor WordPress Theme Zahar - Creative Multipurpose Elementor WordPress Theme Zahar - Creative Multipurpose Elementor WordPress Theme Zahar - Creative Multipurpose Elementor WordPress Theme Zahar - Creative Multipurpose Elementor WordPress Theme Zahar - Creative Multipurpose Elementor WordPress Theme Zahar - Creative Multipurpose Elementor WordPress Theme Zahar - Creative Multipurpose Elementor WordPress Theme Zahar - Creative Multipurpose Elementor WordPress Theme Zahar - Creative Multipurpose Elementor WordPress Theme Zahar - Creative Multipurpose Elementor WordPress Theme Zahar - Creative Multipurpose Elementor WordPress Theme Zahar - Creative Multipurpose Elementor WordPress Theme Zahar - Creative Multipurpose Elementor WordPress Theme Zahar - Creative Multipurpose Elementor WordPress Theme Zahar - Creative Multipurpose Elementor WordPress Theme Zahar - Creative Multipurpose Elementor WordPress Theme Zahar - Creative Multipurpose Elementor WordPress Theme

After you’ve migrated your website, most likely you changed the URL of your website as well, these are the steps you need to take:

  1. Go to Elementor > Tools > Replace URL Tab
  2. Enter your old-url and your new-url and click Replace URL
  3. Under the General Tab > Regenerate CSS, click Regenerate Files
  4. In Settings > General on your WordPress Dashboard, make sure that the URLs are similar.

How to Replace URLs in WordPress | Elementor

Better Search Replace: A New Plugin for Updating URLs and Text in WordPress Databases

When migrating a WordPress site to a new domain, you’ll have to update every instance of the site’s URL in the database. Some developers prefer to use tools like WP-CLI or WP Migrate DB to handle this, while others opt for a general database search and replace plugin with a UI in the WordPress admin.

Search and Replace is an old plugin, with nearly a million downloads, that can be used to update URLs and text in the database. I used this plugin successfully for a number of years, but it went without any updates for long time. It has since come under new ownership, although the screenshots demonstrate just how long ago the plugin was released.

Better Search Replace is a new take on database search and replace plugins. It was heavily based on Interconnect/It’s open source Search Replace DB script that performs replacement actions without damaging PHP serialized strings or objects. I’ve used this script a number of times with success, although it’s not as convenient as a plugin. The Better Search Replace plugin packages it up using native WordPress database functions and adds a friendly UI.

better-search-replace-screenshot

The plugin merges the best features from older plugins and the Interconnect/It script to support the following capabilities:

  • Serialization support for all tables
  • The ability to select specific tables
  • The ability to run a “dry run” to see how many fields will be updated
  • No server requirements aside from a running installation of WordPress

Since searching and replacing in the database is a sensitive action to perform, the “dry run” feature gives you a good idea of what you can expect before pulling the trigger. Even with the option of performing a dry run, you will undoubtedly want to have a backup of your database created before touching it.

better-search-replace-dry-run

Migrations aren’t the only reason for this type of plugin. Perhaps you’ve renamed your company or product line and need to replace all instances throughout your website. This plugin makes it safe and easy to perform the replacements directly within the WordPress admin. I tested it on a development site and found that it is fast and works exactly as advertised.

Better Search Replace was created by Matt Shaw, author of the Revisr plugin that allows developers to synchronize WordPress with a remote Git repository. If you’re a long-time fan of the Interconnect/It script, you’ll find that this plugin is even easier to use. You can find Better Search Replace on WordPress.org.

Using the Velvet Blues Update URLs WordPress Plugin

While updating the Site URL makes it possible for your site to be moved, it doesn’t update internal links or paths to images. The good news is, it is a fairly easy process to update these links.

    1. Begin by logging into your WordPress dashboard.
    1. Do a search for and install this plugin: Velvet Blues Update URLs
    1. Activate the plugin and open the Update URLs settings screen.

update-urls-settings

    1. Enter the previous and current URLs for your WordPress installation. It’s important that the URLs be entered to match the Site URL. For instance, if you included www in your site URL, be sure to include that where appropriate for your Old and New URL.

Old URL: Where WordPress was installed before the move
New URL: Where WordPress is currently installed

    1. Under Step 2 select which types of URLs should be updated. For most users, this should be all except the last option “Update ALL GUIDs.”
    1. Click the Update URLs NOW button to update your site’s URLs

update-urlsYou should receive a notification that URLs have been updated, similar to this:urls-updated

    1. Visiting your site should also show that images and links are no longer broken. If necessary, refresh your page or clear your browser cache to view the changes.

Find & Replace Fields – WP Migrate

The Find & Replace fields are available during any push or pull migration, or when running the Find & Replace tool.

During a migration, you are presented with two standard find and replace fields. These are essential in replacing strings that reference the source website with references to the destination website.

The two standard find and replace fields are:

  • Site URL: any URLs referencing the old site will be replaced by the new URL during the migration.
  • Root file path: any root file paths referencing the old site will be replaced by the new root file path during the migration.
Standard find & replace screen showing find and replace inputs.

The site URL find and replace field is absolutely essential as it changes the siteurl and home values in the wp_options table. These values must be updated during a migration to the correct value to ensure that your website loads correctly.

The root file path find and replace is mostly for third-party plugins that store the website’s root file path in the database. This find and replace field will ensure that these values are updated to the correct root file path during the migration.

The site URL and root file path text inputs are filled in for you automatically when performing a pull or push migration. If performing an export migration you will need to fill in these inputs manually.

#Retrieving the “New URL” and “New file path” information

WP Migrate DB Pro should be installed and active on both the local and remote WordPress installations.

You can use the following method to retrieve the “New URL” and “New file path” information:

  1. Log in to the remote site
  2. Navigate to WP Migrate DB Pro plugin page (Tools → Migrate DB Pro)
  3. Click the Migrate tab and then click Find & Replace
  4. Copy the contents of the first field under the “Custom Find & Replace” header (remote URL)
  5. Switch back to your local site
  6. Navigate to WP Migrate DB Pro plugin page (Tools → Migrate DB Pro)
  7. Click the Migrate tab and then click Find & Replace
  8. Paste the contents of your clipboard into the first empty field under “Replace”
  9. Switch back to the site you logged into during step 1
  10. Copy the contents of the second field under the “Custom Find & Replace” header (remote file path)
  11. Switch back to your local site
  12. Paste the contents of your clipboard into the second empty field under “Replace”

#Custom Find & Replace Fields

Occasionally you might need to specify a custom find and replace field. When doing a push or pull migration, WP Migrate DB Pro will automatically make an additional Custom Find & Replace field available. You can leave this empty, or add a custom find and replace field. If you need more than one custom replacement, you can click the Add Row button below the existing custom find and replace to create a new one.

Custom find & replace screen showing empty find and replace fields.

A prime example of why you’d want to define additional find and replaces is if you have references to your site’s URL in your database that slightly differ in format from your main site’s URL.

Consider the following:

Your website’s URL is: http://hellfish.media

Your default replace will match your site’s protocol-relative URL. If you have references to your site using a sub-domain, these URLs will not be replaced during a migration using the default find and replace fields.

So in this example, http://www.hellfish.media will not be replaced during a migration.

To have those values replaced during the migration you’ll need to add additional find and replace fields to have those slightly different URLs replaced.

For example:

  • Find for //www.hellfish.media and replace with //hellfish.media

#Regular Expression Find and Replace

There are some situations where you need to find and replace data based on a complex set of conditions rather than just a simple string. As an example, let’s say you need to replace a specific shortcode (foo) with a different shortcode (bar) through all the content on a site while retaining the shortcode’s id attribute.

[foo id="1"]

If you run a custom find and replace to replace the term foo, you’d run into a problem where you would affect any data that uses this string (food, foot, etc). You could try using [foo but that might affect any other shortcodes starting with that same string.

This is where a regular expression find and replace comes into play.

Using the same functionality as the PHP preg_replace function, WP Migrate DB Pro allows you to specify a regular expression (regex) string, to find and replace the correct data.

Your regular expression must be a full pattern regex, meaning it must contain all delimiters and modifiers you wish to use. It’s also worth noting that there is only a specific list of modifiers available to the preg_replace function, as detailed in the Regex Pattern Modifers in the PHP manual.

In the above example, your regex would look something like this:

/\[foo id="([0-9]+)"/

The replace string would look like this, where bar is what we want to replace foo with, and $1 is the data from the capturing group in the original regex, in this case, the id value:

[bar id="$1"

In order to run this on your data, either add this as a custom find and replace row during any migration, or use the “Find and Replace” tool on the site where you want to replace the data.

Enable the regex functionality by clicking on the Regular Expression button, next to the find and replace fields.

Enabling regex on a find and replace field.

Then enter the regex in the find field, and your replacement string in the replace field. If your regular expression is invalid, the plugin will display a notification warning, and you will not be able to run the migration/replacement.

Find and replace field warning of invalid regex.

Once you fix the regex, the find and replace row will be ready to be run.

Valid regex for find and replace field.

You can test your regex using a tool like regex101.com. When you copy the valid regex from this tool, you must exclude any modifiers not listed in the Regex Pattern Modifers. For example, a new regex on regex101.com includes the g modifier, which means “find all matches rather than stopping after the first match.”. The preg_replace function assumes that it should be replaced globally, so adding that modifier results in an error. It should be left out of your regex in the find field, and the plugin will report it as an invalid regex if you leave it in.

#Case-Sensitive Find and Replace

Similar to the regex find and replace, it is also possible to enable a case-sensitive custom find and replace.

The default functionality for custom find and replace is to perform case-insensitive searches. This means that if you enter User in the find field, it would find and replace instances of both User and user. This is not ideal if you only want to replace instances of User!

To enable a case-sensitive custom find and replace, click on the Case Sensitive button next to the find and replace row. Then enter the find and replace strings as normal.

Enabling case-sensitive find and replace.

Are you looking for ways where you can integrate OpenTable into your WordPress/Elementor site? Or want to make online restaurant reservations directly from your landing pages?

Then you have come to the right place. In this blog, we will show you how you can easily embed the OpenTable widget in your WordPress site without using any coding. Let’s get started!

What is an OpenTable widget?

Being the preferred real-time online restaurant reservation app, OpenTable does not require an introduction. However, what deserves your attention and an introduction is the – OpenTable widget.

With this widget, you can directly add restaurants to your list by adding the OpenTable Restaurant ID. Customers can then select from the dropdown menu and make reservations trouble-free.

That’s right! No coding! No hassle for you and your customers!

Having said that, let’s examine the steps for integrating OpenTable widget in WordPress.

Embed OpenTable widget in your WordPress site

After installing the above plugins, create a new page or edit the existing page where you want to integrate the OpenTable widget. Now, simply search for the Open Table in the search widget bar and drag it onto the page.

You can locate this widget anywhere on your site. You can, however, easily reach your audience by keeping this widget on your main page.

opentable widget

This is how your OpenTable will look like on your website’s main page. When someone visits your website, he or she can easily reserve a table by selecting the restaurant, the number of people, date, and time.

Open table widget

Grab your OpenTable Restaurant ID

Once you drag the widget, it’s time to add the OpenTable restaurants in the drop-down menu.

To add, simply search for the restaurant’s OpenTable Restaurant ID here. Note down the restaurant ID or just copy it. Now, expand the Basic section of the widget and find the Restaurants field. Here, paste the restaurant ID and save the settings.

Congratulations, you have successfully added a restaurant to your list.

opentable widget

Customization and Styling Details

The MA OpenTable widget comes with additional customization and styling choices.

Starting with the Basic section which comes under the Content tab, gives you the following options:

opentable widget
  • Widget Language: It lets you display the OpenTable in more than 5 languages.
  • Widget Type: You can choose to display the table in either of these forms – wide, tall, button and standard.
  • Reservation Path: This option gives you two options for opening the Find Table window – Open in Overlay and Open in New Window.
  • Alignment: Here, you can select the alignment of your table – left, right and center.

You can make your OpenTable more appealing by styling it according to your website’s theme. You can do this under the Style tab which lets you edit the text and background color, typography, adjust the padding, border type, and radius.

opentable widget

Wrapping-Up

That’s it.! Thank you for taking the time to read our guide. Do let us know in the comments if you have any doubts regarding the steps.

We will respond back to you shortly!

In this article, you will learn how to create the Facebook App ID which opens a lot of opportunities for you.

Following steps to create Facebook APP:

1. Log in to your Facebook account.

2. Go to Facebook for Developers, click on My Apps and press Create App.

Facebook create app

3. Set the Display Name of your application.

4. Enter the Contact Email.

Facebook create new app id

5. Navigate to Facebook Login and press the Set up button.

Facebook add product

6. Select Web from the displayed platforms.

Facebook website platform

7. Go to the Settings section and choose Basic.

8. In the appeared menu some of the fields are generated automatically. All you need to do is fill in the rest of them, such as App Domains and Contact Email in particular. Please note these two are obligatory options. Privacy Policy URL and Terms of Service URL are optional, but we recommend you NOT to leave them blank. You will not be able to switch your application to live mode without them being set.

9. Once you’ve filled all the necessary fields, press the Add Platform button to move to the next step.

Facebook app id basic settings

10. Select the Website from the list.

Facebook app platforms

11. Set the website URL address in the Site URL field and press the Save Changes button.

Facebook website web id

12. Navigate to Facebook Login section and press Settings.

13. Enter you Valid OAuth Redirect URLs. It differs depending on the software you are using it for. Usually, you can get  OAuth Redirect URL in the software settings info.

14. Make sure Enforce HTTPS option is enabled due to the Facebook Enforce HTTPS default setting.

15. Press the Save Changes button.

Facebook client oauth login settings

Once you’ve saved all the changes  Switch your Facebook APP to Live Mode.

Magento 2 Facebook app id

15. Go to Settings > Basic. Here you can find the App ID and App Secret that you will need for software that uses Facebook APP.

Facebook for developers app id


How to Add a Sidebar in WordPress

Depending on your theme, you may have one or more sidebars available to customize. If a sidebar region does not contain any widgets, it won’t appear on your pages by default. To display a sidebar on your site, simply add widgets to one.

You can customize your sidebar in the WordPress Customizer tool, or on the Widgets page in the dashboard. We’ll review how to do both below:

To create a sidebar with the WordPress Customizer:

1. From your WordPress dashboard, select Appearance > Customizer.

2. In the customizer, choose Widgets, then the sidebar you want to edit.

3. Click Add a Widget and choose a widget from the menu. The widget will be added to your active widgets list in the left panel and in your live preview.

adding a blog sidebar in the wordpress customizer

4. Customize your widget settings. When finished, click Done. Click Delete to clear an unwanted widget.

5. Add as many widgets to your sidebar as you like. To change the order of the widgets, click and drag a widget to a new position in the left side panel, or click Reorder and toggle your widget order with the up/down arrow buttons.

6. When finished, click Publish.

To create a sidebar in the Widgets page:

1. From your WordPress dashboard, select Appearance > Widgets. On the Widgets page, you’ll see all available widgets on the left side. If your theme supports sidebars, you’ll see a Sidebar option to the right.

adding a blog sidebar in the wordpress widgets menu

2. Add a widget to your sidebar by clicking and dragging an available widget from into the Sidebar dropdown. Alternatively, click the down arrow icon on your desired widget, then choose a sidebar from the menu and click Add Widget.

a widget module in wordpress

3. Customize your widget settings. When finished, click Done or Save. Click Delete to clear an unwanted widget.

4. Add as many widgets to your sidebars as you like, then preview your changes.

How to Remove a Sidebar in WordPress

Blog sidebars have many benefits, but they’re not perfect for every page or blog design. You may prefer to place your navigation, post recommendations, and CTAs elsewhere.

In this case, removing a sidebar from your WordPress site is straightforward — here’s how to do it in the Customizer and from the dashboard:

To remove a sidebar with the WordPress Customizer:

1. From your WordPress dashboard, select Appearance > Customizer.

2. In the customizer, choose Widgets, then the sidebar you want to remove.

3. Open the first widget listed by clicking the down arrow icon, then choose Remove. The widget will disappear from the sidebar in the preview window.

a widget module in wordpress

4. Repeat step 3 for all widgets in your sidebar. Once all widgets have been cleared, the sidebar will disappear from the preview.

To remove a sidebar in the Widgets page:

1. From your WordPress dashboard, select Appearance > Widgets.

2. Open the Sidebar dropdown that you want to remove from your site.

3. Open the first widget in the sidebar and click Delete.

a sidebar module in wordpress

4. Repeat step 3 for all widgets in your sidebar. Once all widgets have been cleared, the sidebar will be removed from your pages.

Enhance Your WordPress Blog With a Sidebar

While sidebars may not work on every blogging website, they’re a mainstay of many blogs today and probably aren’t going away. With WordPress widgets, it’s easy to do testing and on-the-fly reorganization of your sidebars.

So, try experimenting with your sidebar layout and contents to see what keeps users clicking the most. Frequent blog readers will look for a sidebar if they want to find more content or learn more about your brand — make sure you have one that serves them what they need.

Use Elementor to Design Custom Widgets

If you have Elementor Pro, you can use Elementor’s visual, drag-and-drop interface to design content that you include in your sidebar.

To achieve this, go to Templates → Add New and create a new Section template. For example, you could create a template that includes an email opt-in form or a call to action (CTA). Make sure to publish your template when you’re finished.

Next, add the Elementor Library widget to your sidebar where you want your template to appear. Then, use the Choose Template drop-down to choose the specific template that you want to add to your sidebar:

So far, we’ve assumed that your theme already has support for sidebars and gives you built-in settings to control them.

However, what if that’s not the case? Some situations you encounter could be:

  • Your theme doesn’t have any built-in support for sidebars. This is true of the Hello theme because Hello aims to create the most lightweight foundation possible.
  • Your theme only includes one sidebar area but you’d like to add another one.

Thankfully, it’s pretty painless to create a sidebar. There are two basic steps here:

  1. You register your custom sidebar with WordPress via a simple code snippet.
  2. You edit your site to display the sidebar on the front-end (via a plugin or code)

1. Register Your Sidebar

Before you can add widgets to your sidebar and display them on the front-end of your WordPress site, you need to register your sidebar(s) with WordPress.

Once you’ve registered your WordPress custom sidebar, it will show up when you go to Appearance → Widgets and you’ll be able to add widgets using the method from the previous section.

To register your custom sidebar, all you need to do is add a small code snippet to either:

  • The functions.php file of your theme (make sure you use a child theme if doing so).
  • A free snippet manager plugin like the Code Snippets plugin.

Using the Code Snippets plugin (or something similar) is the simplest solution because it eliminates the need to use a child theme.

Here’s the code snippet that you need:

function my_custom_sidebar() {
	register_sidebar(
		array (
			'name' => __( 'Custom Sidebar Area', 'your-theme-domain' ),
			'id' => 'custom-side-bar',
			'description' => __( 'This is the custom sidebar that you registered using the code snippet. You can change this text by editing this section in the code.', 'your-theme-domain' ),
			'before_widget' => '<div class="widget-content">',
			'after_widget' => "</div>",
			'before_title' => '<h3 class="widget-title">',
			'after_title' => '</h3>',
		)
	);
}
add_action( 'widgets_init', 'my_custom_sidebar' );

And here’s what that snippet looks like in the free Code Snippets plugin:

2. Display Your Sidebar

Once you’ve registered your sidebar, you should see it show up as an option when you go to Appearance → Widgets. If you want, you can start adding widgets to your custom sidebar just like we showed you before:

However, you’re not quite finished yet – you still need to configure WordPress so that it displays your custom sidebar (and its widgets) on the front-end of your site.

Here, you have two options:

  • Elementor’s Theme Builder – you can use a visual, drag-and-drop interface to configure everything and add your sidebar. You don’t need to know any code.
  • Code – you’ll need at least a basic understanding of PHP, HTML, and CSS.

How to Create a Sidebar With Elementor

With Elementor, you can create new templates for any part of your theme. For example, if you create a new template for your “Pages”, all of your pages will automatically use that template.

You can do the same for your blog posts (or custom post types). You can also conditionally apply your templates to different content, which is useful because it lets you add a sidebar to some pieces of content but not others.

To use Elementor to display your custom sidebar, you’ll basically create a new post or page template that includes your sidebar alongside your main content area.

To get started, go to Templates → Theme Builder. Then, choose where you want to add your sidebar first – either Single Post or Single Page:

custom-wordpress-sidebar-3-create-theme-builder-template

To save time, you can choose one of the premade templates. Or, you can build your design entirely from scratch. The simplest option is to just choose one of the templates that already includes a sidebar:

custom-wordpress-sidebar-4-theme-builder-premade-templates

If you opt to design your template from scratch, just make sure to use two columns and add the Sidebar widget where you want your custom sidebar to appear.

Then, edit the Sidebar widget and use the Choose Sidebar drop-down to select the custom sidebar that you registered in the previous step.

Once you do that, you should see a live preview of any widgets that you’ve already added:

custom-wordpress-sidebar-5-add-sidebar-widget-in-elementor

As you add new widgets via the WordPress Customizer or the dedicated widgets area, they will automatically appear in this sidebar area.

To finish things out, make sure to Publish your template. When you do, you can use display conditions to control where your sidebar template appears. You can either display it on all content (to use your sidebar sitewide). Or, you can use the display rules to only add your sidebar to specific content.

How to Add Your Sidebar With Code

Unless you feel comfortable working with HTML/CSS/PHP, you should stick with the Elementor method above.

To display a WordPress custom sidebar with code, you’ll need to directly edit your theme’s template files. Because you’re making direct edits to your theme, it’s essential that you use a WordPress child theme. This will prevent your changes from being overwritten when you update your theme.

To learn more about child themes and how to create them, you can read the comprehensive guide to WordPress child themes.

Once you’ve created your child theme, copy the single.php file from your parent theme’s folder to your child theme’s folder. Then, edit the single.php file and add the following snippet where you want your custom sidebar to appear:

<?php if ( is_active_sidebar( 'custom-side-bar' ) ) : ?>
	<div id="primary-sidebar" class="primary-sidebar widget-area" role="complementary">
		<?php dynamic_sidebar( 'custom-side-bar' ); ?>
	</div><!-- #primary-sidebar -->
<?php endif; ?>

To make sure the sidebar appears in its own column, you’ll likely also need to add some custom CSS. This is why the Elementor method from above makes a better option if you’re not a developer.

Depending on how you want to set things up, you might also need to add this snippet to additional template files (like archive.php, etc.)

For a deeper look at this topic, you can consult this WordPress Codex entry.

How to Remove A Sidebar in WordPress

Now, let’s go the other direction and talk about how to remove a sidebar that you don’t want to use. For example, maybe your theme comes with its own sidebar, but you’d rather use a full-width template for some or all of your content.

To remove a WordPress sidebar, you have the same two options as creating a custom WordPress sidebar:

  • Elementor Pro
  • Code

However, before you turn to these options, make sure that your theme doesn’t include a built-in feature to let you disable the sidebar. Many themes give you an option in the WordPress Customizer where you can disable the sidebar without any manual action on your part. Or, your theme might already come with a full-width template, which you can select when working in the WordPress editor.

If your theme doesn’t include this option, here’s how to manually remove your sidebar.

How to Remove a Sidebar With Elementor

To remove your WordPress sidebar with Elementor, all you need to do is create a template that doesn’t include a sidebar area. Then:

  • If you want to completely remove your sidebar from all content, you can use this template sitewide.
  • If you only want to remove your sidebar from certain content, you can conditionally display your sidebar-less template wherever it’s needed.

To get started, go to Templates → Theme Builder and choose where you want to remove your sidebar first – either Single Post or Single Page:

To save time, you can choose one of the premade templates that don’t have a sidebar. Or, you can also build your design from scratch – just don’t add the Sidebar widget!

Once you’re finished, you can Publish your template and use the display conditions to control where it appears.

How to Remove Your Sidebar With Code

You can also remove a WordPress sidebar by directly editing your theme’s template files and removing the PHP snippet that displays the sidebar.

Because you’ll be editing your theme’s files, make sure to use a child theme. Then, copy over the template files for the content where you want to remove the sidebar. For example, single.phparchive.php, etc.

Edit those files and remove all instances of <?php get_sidebar(); ?> (or similar variations – the code might look slightly different).

You might also need to adjust the HTML and CSS to make sure everything looks right.

If you’re not familiar with PHP, HTML, and CSS, we recommend sticking with the Elementor method because it eliminates the need to use code.

How to Display Different Sidebars on Different Content

In an earlier section, we talked about how to add a sidebar in WordPress even if your theme doesn’t support it.

However, what if you want to take your existing sidebar area, but just display different sidebars on different content? This would let you display different collections of widgets for certain types of content.

For example, maybe you want to use one set of widgets for blog posts in your “Reviews” category and a different set of widgets for blog posts in your “Tutorials” category.

The easiest way to display different sidebars on different content is Elementor. You do this as follows:

  • First, create several Elementor templates, as explained above. Each template should have its own sidebar.
  • Then, go to conditions and assign each template to the relevant category, page, or other condition.

Additionally, to achieve this functionality, you can use the free Content Aware Sidebars plugin. Once you install and activate the plugin, go to Content Aware → Add New to get started.

First, choose the conditions for when you want to replace your default sidebar with the new sidebar that you’re creating. For example, if you want to use this sidebar for all blog posts in the “Reviews” category, create a Categories condition:

content-aware-sidebars-1-conditions

Next, go to the Action tab and choose which sidebar you want to replace. Or, you can also “merge” sidebars to include content from both:

You can peruse the other tabs for some additional settings, but there’s nothing else you need to configure.

Once you’ve made your choices, click Create. Then, go to Appearance → Widgets to add content to your conditional sidebar:

content-aware-sidebars-3-add-widgets

8 Best WordPress Sidebar Plugins to Enhance Your Sidebar

To finish things out, let’s go over some of the best WordPress sidebar plugins that can enhance how you work with sidebars and what content you can include.

Some of these plugins add useful new widgets that you can include in your sidebars, while others adjust the sidebar itself. You’ll also see a few familiar faces from the tutorial sections above.

Theme is missing the style.css stylesheet error

Why should you speed up WordPress?

There are many reasons that ring alarm bells, some of which might even cause major concerns for you:

  1. Search engines (like Google) rank websites with fast-loading times higher than the slow-loading ones. So, if you want to improve your position in the SERPs, improving speed should be one of your priorities.
  2. Studies have shown that site-loading speed of more than 2 seconds usually results in about 47 percent of visitors bouncing off the website. So, to keep about half of your visitors interested, you should speed up your WordPress.
  3. Online buyers are the most impatient lot; they expect the page to load within a second. So, if you are running an e-commerce store on WordPress then you better get ready to make major improvements so your business can be more profitable.

How to test the loading time of your website?

First things first, you need to analyze the current load time for your website. Keep in mind that this speed may differ from page to page, as it depends on various factors, namely:

  • the size of that particular page,
  • how many requests it generates,
  • whether it is cached or not,
  • and lastly, what kind of content (static or dynamic) it hosts.

The homepage of a website is usually used as a benchmark to test the load time. In order to check the speed of a website, the following three tools are used extensively across the web:

  1. WebPageTest.org
  2. Tools.Pingdom.com
  3. PageSpeed Insights (this doesn’t really report the page loading time, but does highlight the elements that you can tweak to speed up WordPress)

Okay, it’s about time to start talking some business!

Here are the 11 ways to speed up WordPress:

1. Choose a better web hosting provider

The major factor that influences the speed of a website is the hosting of your WordPress website. It might seem like a good idea to host your new website on a shared hosting provider that offers “unlimited” bandwidth, space, emails, domains and more. However, the point that we usually miss out on regarding this offer is that shared hosting environments fail to deliver good loading times on peak traffic hours, and most fail to provide 99 percent uptime in any given month.

Shared hosting tends to deliver a poorer performance because you are sharing the same server space with countless other websites, and there is no telling how much resources others are using. Plus, you don’t know exactly how well the servers are optimized.

Thankfully, the web-hosting industry has advanced with technology, and the prices of cloud hosting providers have decreased with the passage of time. In the present times, you can buy dedicated cloud servers from SiteGround, DigitalOcean, Amazon Web Services, and even Google Compute Engine at a nominal price. However, setting those servers up can be a daunting task as you are required to set servers up from scratch. There are web hosting providers like Cloudways (where I work) who make the task of setting up optimized cloud servers as easy as click and launch.

2. Use a lightweight WordPress theme / framework

WordPress themes with a lot of dynamic elements, sliders, widgets, social icons and many more shiny elements are immensely appealing to the eye. But remember this: if they have too many elements and higher page sizes, then they will definitely cause your web server to take a thumping.

The best option here is to use lightweight themes. One solution is to go for one of the default WordPress themes. Another is to try out something like Blance, built by the same guys behind JWSTHEMES.


Author(s): JWSThemes team

Current Version: 3.5.2

Last Updated: March 01, 2022

3. Reduce image sizes

Images are the major contributors to the size increment of a given webpage. The trick is to reduce the size of the images without compromising on the quality.

If you manually optimize the images using Chrome PageSpeed Insights extension or Photoshop or any other tools, the process will take a long time. Fortunately, there are plugins available for just about everything you can think of, including image optimization. The ones worth mentioning are:

Using any of the above-mentioned plugins on your WordPress site will drastically reduce image sizes, thus improving the speed of your website.

4. Minify JS and CSS files

If you run your website through Google PageSpeed Insights tool, you will probably be notified about minimizing the size of your CSS and JS files. What this means is that by reducing the number of CSS and JS calls and the size of those files, you can improve the site loading speed.

Also, if you know your way around WordPress themes, you can study the guides provided by Google and do some manual fixing. If not, then there are plugins that will help you achieve this goal; the most popular being the Autoptimize which can help in optimizing CSS, JS and even HTML of your WordPress website.

5. Use advanced caching mechanisms with a caching plugin

WordPress caching plugins (e.g. W3 Total Cache) has been there for a long time, making the complex tasks of adding caching rules to your website elements easier. Combining such plug-ins with advanced caching mechanisms like Varnish could help you better the loading speed of your website and ultimately speed up WordPress considerably.

6. Use a CDN

The people who visit your website belong to various locations in the world, and needless to say, the site-loading speed will differ if the visitors are located far away from where your site is hosted. There are many CDN (Content Delivery Networks) that help in keeping the site-loading speed to a minimum for visitors from various countries. A CDN keeps a copy of your website in various data centers located in different places. The primary function of a CDN is to serve the webpage to a visitor from the nearest possible location. Cloudflare and MaxCDN are among the most popular CDN services.

7. Enable GZIP compression

Compressing files on your local computer can save a lot of disk space. Similarly, for the web, we can use GZIP compression. This maneuver will dramatically reduce the bandwidth usage and the time it takes to gain access to your website. GZIP compresses various files so that whenever a visitor tries to access your website; their browser will first have to unzip the website. This process brings down the bandwidth usage to a considerable extent.

You can use either a plugin like the PageSpeed Ninja, which enables GZIP compression or add the following codes in your .htaccess file.

AddOutputFilterByType DEFLATE text/plain
AddOutputFilterByType DEFLATE text/html
AddOutputFilterByType DEFLATE text/xml
AddOutputFilterByType DEFLATE text/css
AddOutputFilterByType DEFLATE application/xml
AddOutputFilterByType DEFLATE application/xhtml+xml
AddOutputFilterByType DEFLATE application/rss+xml
AddOutputFilterByType DEFLATE application/javascript
AddOutputFilterByType DEFLATE application/x-javascript

8. Cleanup WordPress database

Deleting unwanted data from your database will keep its size to a minimum and also helps in reducing the size of your backups. It is also necessary to delete spam comments, fake users, old drafts of your content and maybe even unwanted plugins as well as themes. All of this will reduce the size of your databases and web files, and thus speed up WordPress – your WordPress.

9. Deactivate or uninstall plugins

Keeping unwanted plugins on your WordPress websites will add a tremendous amount of junk to your web files. Moreover, it will also increase the size of your backup and put an overwhelming amount of load on your server resources while backup files are being generated. It is better to get rid of the plugins that you don’t use and also look for alternate methods to use third-party services for automating or scheduling tasks (like sharing of your latest posts on social media).

IFTTT or Zapier are two web services that help in automating such tasks and reduce the burden on your website and server resources.

10. Keep external scripts to a minimum

The usage of external scripts on your web pages adds a big chunk of data to your total loading time. Thus, it is best to use a low number of scripts, including only the essentials such as tracking tools (like Google Analytics) or commenting systems (like Disqus).

11. Disable pingbacks and trackbacks

Pingbacks and trackbacks are two core WordPress components that alert you whenever your blog or page receives a link. It might sound useful, but you also have things such as Google Webmaster Tools and other services to check the links of your website.

Keeping pingbacks and trackbacks on can also put an undesirable amount of strain on your server resources. This is so because whenever anyone tries to link up to your site, it generates requests from WordPress back and forth. This functionality is also widely abused when targeting a website with DDoS attacks.

You can turn it all off in WP-Admin → Settings → Discussion. Just deselect “Allow link notifications from other blogs (pingbacks and trackbacks).” This will help you speed up WordPress some more.

Conclusion

The biggest advantage of lowering your website’s loading time is that it will help tremendously in improving the experience of your visitors. The case remains the same whether they are using mobile devices or PCs. Furthermore, it will also improve your rankings in the SERPs. After all, reduced bandwidth usage of your hosting and faster site-loading speed on the client side will only benefit you both in the short as well as the long run.
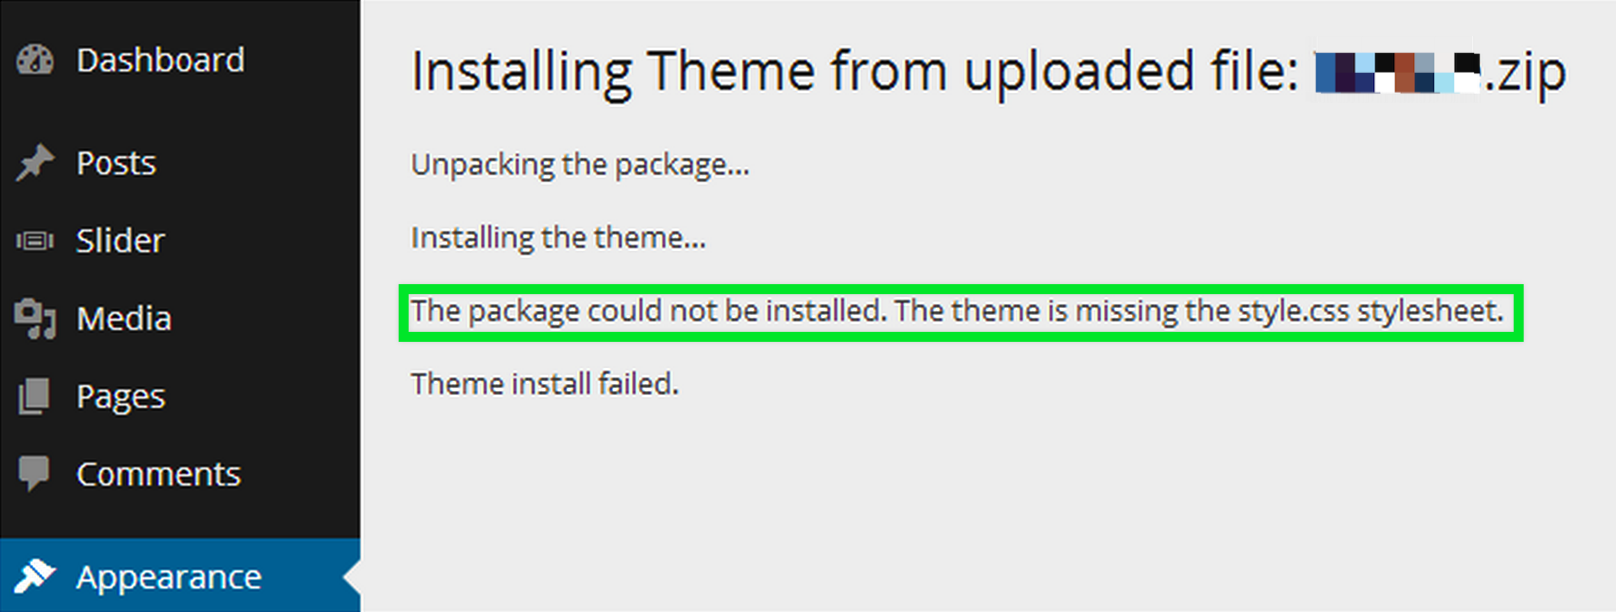
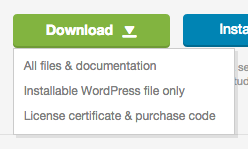
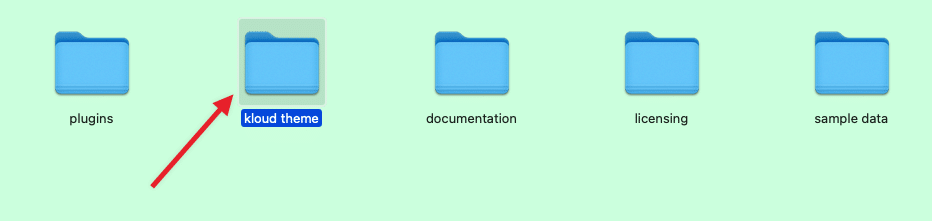